
Since its officially the first day of 2014, posting about a resolution might be a bit cliche, but I'm going to argue that since it's my blog, I'm allowed. And I'm just going to apologize in advance for any other cliches you might come across while reading this post, but while you're rolling your eyes, they're cliches for a reason...okay? Okay! Here we go...
You all know that I decided to start my year off by creating a new blog. My first, well technically second, post is going to be about one of my new years resolutions: trying to save some money.
I've always been horrible about saving up. As a little kid, whenever I got my allowance, I would immediately beg my parents to take me to the mall so I could buy something shiny and new. That, coupled with my knack for somehow always liking the most expensive thing in the store, led to an embarrassingly early development of poor money saving. Now fast forward a decade and I still have the urge to spend spend spend (my closet is clearly evidence of that but old habits die hard). Since I just graduated, though, I decided that I should finally act like an adult, or attempt to be one, and give a shot at saving up.

A couple weeks ago, I came across something called the 52 Week Challenge on Pinterest. The concept behind it is pretty simple. For the first week, you put $1 away. For the second week, you put away $2. For the third week, you put $3 away...all the way up until week 52 where you put away $52. By the end of it, you'll have $1,378 saved up!
Now you can reward yourself by turning 52 weeks of self-restraint into a glorious, unnecessary-but-who-cares gift that is to yourself, from yourself (which, let's be honest, is the best of all gift giving and receiving scenarios). For those who need shopping inspiration, with money like that I just might spend it on this lovely Alexander Wang Rocco duffle that I've had my eye on for a while now or a set of these bad boys by Le Creuset. Bonus points: there'd still be some money leftover.


There is, however, the less fun but likely more rewarding alternative of putting the money away for a rainy day (...what I should be doing with it). Now by no means do I think this is the perfect long-term solution for saving up money, but it is a good way to start off. Well, at least for me. Little goals, you know? Let's take baby steps toward saving and then relish in our success. Which means that you can try this out if you want and at the end of the challenge, do with the money whatever you please. I'm already doubting my ability to withstand the lure of Alexander Wang. No shame, though. You wouldn't be reading this blog if you were against fashion. We've all felt that pull. You get me?
In order to motivate myself to follow through and complete the challenge, I decided to create something functional yet appealing to store all my savings. You catch more flies with honey. The hope is that I'll be more willing to part with money if I know it's going to a well-crafted home, as opposed to letting it sit in a worn, hollowed out tissue box. And I'm going to share with all of you how you can make a cute container to hold your money, too.

For this little DIY, you will need: a jar/container/bag, or anything that can hold money and hopefully has a lid to keep your well saved money protected. I chose to go with this mercury glass from Marshalls that I found on clearance. This classic mason jar from Amazon is a good option or this cute silver box from Target. You will also need some glue, sparkly pens (I went for the good ol' Gelly Roll pens, do you guys remember those from elementary school?), card stock paper in a color of your choice, graphing paper, pencil, eraser, and any other decorative items that your heart desires. I chose some glitter letters. I got most of the things from Blick but they should be available at most craft stores or crafting sections of Walmart or Target. I decided to keep my jar simple but feel free to include anything to make your design your own.
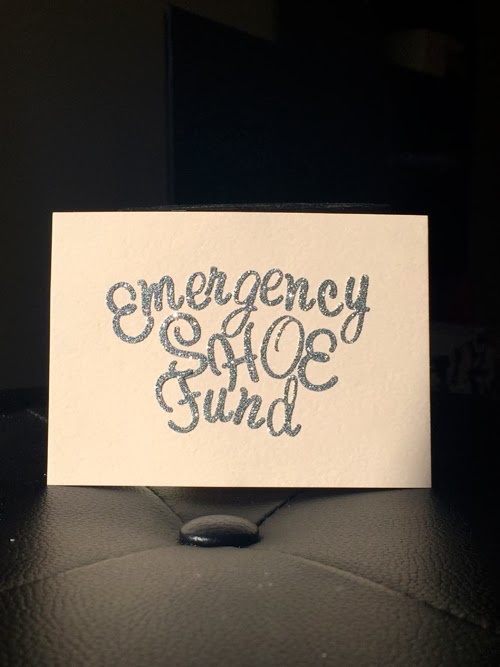
The first thing I did was figure out what I wanted to name my jar. I went with "Emergency Shoe Fund" because a girl can never have too many pairs of shoes. Another favorite option of mine I saw while walking through Marshalls: "my stache" with a picture of a mustache. Who doesn't love a good pun? Or maybe "Feed Me" and turn your jar into a hungry mouth. The possibilities are endless.
Take your stock card and measure it against the jar so that you can determine the space you have for your sign. You don't want to have a giant sign that swallows your jar or a tiny one that can't be read. Then I worked on my letter spacing on my stock card and stuck them on.
After I came to a layout that I liked, I then used a pencil to draw a shape outline. I can't free hand draw to save my life and I'm a bit OCD about things being symmetrical, so I used graphing paper to help with my shaping. You can also use a stencil, it'll save you a lot of time and get the perfect shape instantly.

I chose to go over my shape with a sparkly gray pen since I was cutting around the actual shape to create a border.

Voila! All you have to do is glue your sign to your jar and wait about an hour or two for it to dry. You now officially have something pretty to store your funds and help motivate you to save a little.

 |
| Picture from etsy |
Take your stock card and measure it against the jar so that you can determine the space you have for your sign. You don't want to have a giant sign that swallows your jar or a tiny one that can't be read. Then I worked on my letter spacing on my stock card and stuck them on.
After I came to a layout that I liked, I then used a pencil to draw a shape outline. I can't free hand draw to save my life and I'm a bit OCD about things being symmetrical, so I used graphing paper to help with my shaping. You can also use a stencil, it'll save you a lot of time and get the perfect shape instantly.
I chose to go over my shape with a sparkly gray pen since I was cutting around the actual shape to create a border.
Voila! All you have to do is glue your sign to your jar and wait about an hour or two for it to dry. You now officially have something pretty to store your funds and help motivate you to save a little.
I think this also makes for a great room decoration and will remind me every week that I need to put some money away. So go and grab a glass of bubbly to celebrate the beginning of what is hopefully a fruitful new year!
No comments :
Post a Comment